
Pre-requisites of IaaS
1. Windows Server 2008 or 2012.
2. Dot Net Framework 4.5
3. vCAC Prereq Automation Script (Optional)
4. Separate blank Database.
These are the 6 core components of IaaS,
1. IIS Role
2. Distributed Execution Managers (DEMs)
3. Agents
4. Model Manager
5. Manager Service
6. Database

Iaas Component Architecture Diagram
To start with, make sure the PowerShell policy is set correctly. Set the Execution policy to remote signed.

For installation of vCAC IaaS engine there is a "vCAC Prereq Automation Script" that can be used. This script adds the IIS role and configures all the pre-requisites required for IaaS.
The script is located on this link: vCAC Prereq Automation Script
1. When you run the script.
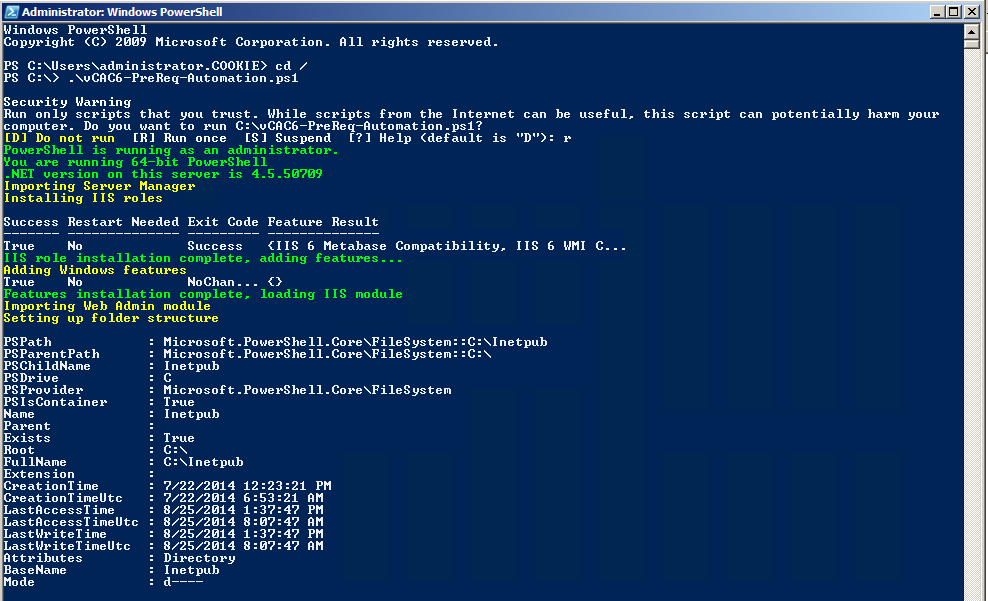
2. Once the script is completed successfully,

3. vCAC IaaS engine software is available on the vCAC appliance page as shown in the screenshot below. Download the 'setup.exe'. You can also download the Service pack.

5. Run the 'setup.exe' to begin the installation,
6. Accept the License.

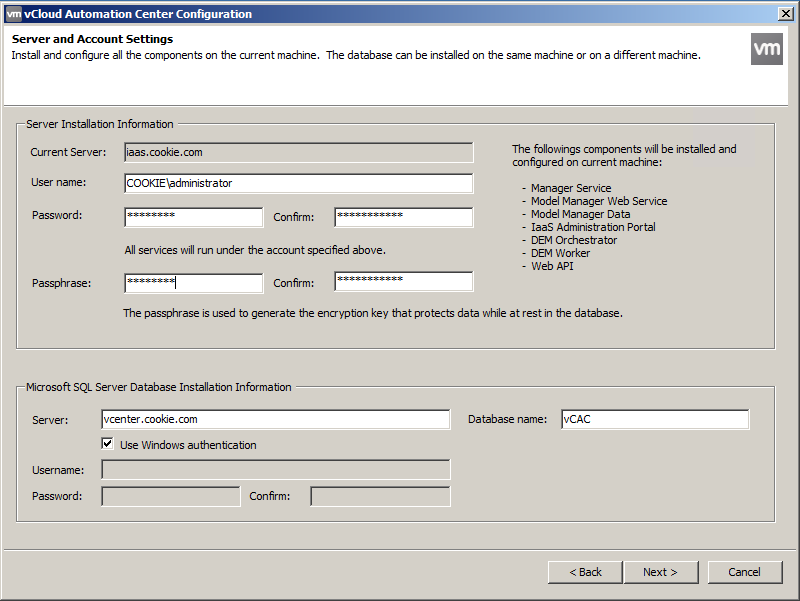
7. Enter the vCAC credentials.

8. Choose the type of installation.

9. It will now run the Pre-requisite verification.

10. Make sure all the pre-requisites are green wherever it is Red X. If it is small arrow and a Tick then it means it can be safely by passed.


11. You must already have the empty Database ready by this time. Enter all the details including the DB server and vCAC database will be created for you.
12. This is an important screen because here the Agents names are provided and are required at the time of Proxy configuration. It is highly recommended to take a screenshot of this screen.
Provide the Names for the Distributed Execution Manager,
Distributed Execution Managers (Orchestrator and Worker)
A Distributed Execution Manager (DEM) executes the business logic of custom models, interacting with the IaaS database and external databases. DEMs also manage cloud and physical machines.

13. Click on the 'Load' button to populate the SSO tenant. Click on the 'Download' button to populate the certificate and then click on 'Accept Certificate'.
SSO User Name should be automatically populated. Give the password and Test it, the result should be passed.
Similarly Test for the IaaS connectivity should also be passed. Once done click Next.

14. Ready to install and Click 'Finish'.

15. The installation will now begin.

16. Once complete you will see something like below.

17. Click 'Finish'.

IaaS installation completes here. Next is to configure the vCAC Service Portal.
Wow what a great blog, i really enjoyed reading this, good luck in your work. Instrumentos de evaluación de desempeño
ReplyDelete